Journal · From the Bench
Cutting Leather from a Full Hide: What Actually Happens on the Bench
I'm Gordon, and I cut every Rogue Artisan piece by hand from full-grain vegetable-tanned and Horween Chromexcel hides in my East Vancouver shop. A whole hide runs 45-55 square feet, and only the cleanest sections become wallet panels, belt blanks, or bag parts — the rest is scrap. Knowing where to cut, and where not to, is the difference between a wallet that ages beautifully and one that warps or tears at a stress point.
What a Full Hide Looks Like When It Arrives
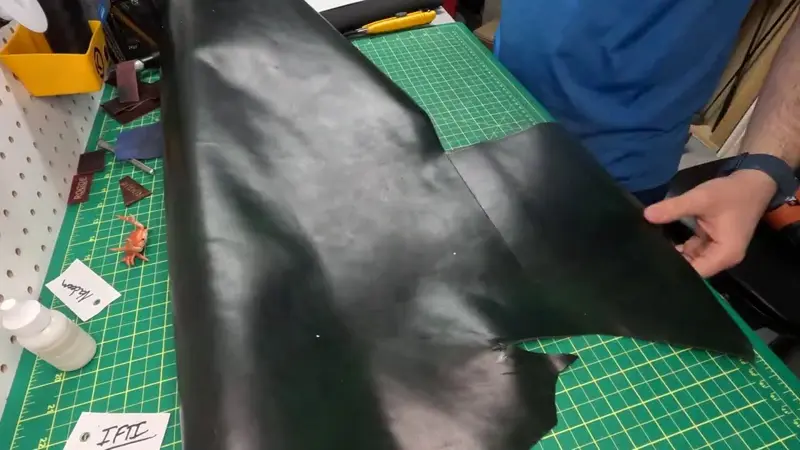
A full-grain leather hide isn't a perfect rectangle. It arrives folded, sometimes with a slight curve along the spine where the animal's back was. The best leather goods makers start by unfolding it flat on the bench and letting it relax for an hour or two — Chromexcel especially has memory from being packed and will want to curl back up.
You'll see three main zones. The back (or bend) is the tightest, most uniform fibre structure — that's where belt blanks and structural panels come from. The shoulder has more stretch and visible grain character, good for softer pieces. The belly is loose, often wrinkled, and I rarely cut wallet panels from it because it distorts under saddle-stitch tension.
Reading the Hide: Scars, Brand Marks, and Grain
Every hide tells a story. Branding marks from the ranch sit near the spine. Insect bites show up as small clusters. Stretch marks from pregnancy or growth appear as parallel lines in the shoulder. None of these are defects in the leather itself — they're full-grain character — but they change where I can cut.
For a custom wallet, I need a section roughly 8" x 4" with no scars running through the fold area. For a belt blank, I'm looking for a straight 48" run along the bend with consistent 8-10 oz thickness. The first cut I make is always a test strip near the edge to check how the knife behaves — some hides have a tighter fibre structure that wants to skip, others cut like butter.
Why Hide Position Matters for How Your Piece Ages
A panel cut from the bend will hold its shape for decades with minimal stretch. A panel cut from the belly might bag out within a year of pocket carry. For something like a card holder that gets constant hand stress, bend or shoulder-cut panels are the only sensible choice. This is also why two "identical" wallets from the same tannage can age completely differently — the hide position is baked in from day one.
Laying Out Patterns to Waste Less
Pattern layout is half geometry, half Tetris. I trace each pattern piece with a scratch awl before cutting — pencil smears on dark Chromexcel, and chalk can leave residue in the grain. The rule is: structural pieces along the spine, decorative or smaller pieces (like card slot panels) toward the edges where the hide is thinner.
For a bifold wallet, the two main panels sit side by side along the bend. Card slots get nested into the leftover shoulder sections. A well-laid hide can yield three to four full wallets from what looks like a small scrap pile after the first cut. A poorly laid hide wastes 30% more material and forces compromises on grain consistency.
The video above shows me laying out panels on an indigo Chromexcel hide — you can see how the grain tightens as I move toward the spine, and how I rotate smaller pieces to fit the irregular edges.
The Cut: Knife, Straight Edge, and Pressure
I use a head knife or a Veritas-style skiving knife depending on the piece. The blade has to be sharp enough that it cuts fibre rather than tearing it — a dull blade pulls the grain up and leaves a rough edge that shows through finishing. For long straight cuts on belt blanks, a steel ruler and a utility knife on a self-healing mat works fine.
One pass, firm pressure, no sawing. Sawing stretches the cut edge and throws off your stitch line by a millimetre or two, which compounds across a saddle-stitched seam. The cut should sound like a single clean slice, not a scrape.
Fitting Panels and Trimming to Final Size
After the rough cut, panels get trimmed to their final dimensions with a smaller knife or shears. Wallet panels are cut slightly oversized and then skived down at the fold edges to reduce bulk — you can see the skiving step in the trimming clip. Bag panels and belt blanks are cut to finished size directly because there's no folding.
Thickness, Weight, and What I Actually Use
Leather thickness is measured in ounces (oz) — one ounce equals 1/64 of an inch. For context:
- 2-3 oz: linings, card slot panels, thin pouches
- 4-5 oz: wallet bodies, passport sleeves, most EDC pieces
- 6-7 oz: heavier wallets, small bag panels
- 8-10 oz: belts, structural bag straps, sheaths
Most of my work uses 4-5 oz veg-tan for bodies and 2-3 oz for linings. Chromexcel tends to come in at 3.5-4 oz because of the hot-stuffed wax content — it feels thinner than veg-tan of the same weight but behaves heavier in the hand. If you're curious about the difference, I break it down in the Chromexplain explainer.
Vancouver Realities: Cutting in a Wet Coast Shop
East Vancouver humidity runs 60-80% most of the year. Vegetable-tanned leather absorbs moisture from the air, which makes it slightly more pliable to cut but also more prone to warping if stored improperly. I keep hides flat on wooden boards, never folded long-term, and I condition the cutting area with a fan in summer to keep air moving.
Rain is the other factor. A customer biking to the studio for a pickup with a wet jacket can drip onto a finished piece — that's why I always hand off work in a paper bag with a care card, and why I wrote a whole piece on rain care.
Why This Matters for Your Commission
When you order a custom piece from me, the hide position, grain tightness, and thickness are all decisions I make before I touch a pattern. You're not getting a pre-cut kit assembled by someone else — you're getting panels I selected and cut from a specific zone of a specific hide, with the scars and character mapped around your piece. That's the difference between full-grain leather goods and the alternative.
If you want to see how the panels become a finished wallet, the wallet build journal walks through the next steps. And if you're curious about the broader saddle-stitch process that follows cutting, that piece covers the needle and thread work.
Frequently Asked Questions
How big is a full leather hide?
A typical cowhide runs 45-55 square feet, roughly rectangular but with irregular edges. Smaller hides (calf, side) come in at 20-30 square feet.
Can you use scarred leather for wallets?
Yes, if the scar is in a non-structural area. I often cut around brand marks and incorporate them as character — but never through a fold line, stitch line, or stress point.
What's the difference between full-grain and genuine leather?
Full-grain uses the entire top layer of the hide with the natural grain intact. "Genuine leather" is a lower layer that's often embossed and finished to look like higher-grade material. I only work with full-grain — the comparison is detailed in this journal entry.
Do you ever use the belly section?
Rarely for structural pieces. The belly is too loose-fibred and will stretch under load. I sometimes use small belly scraps for fob backers or decorative inlays where stretch isn't an issue.
How do you store leftover hide?
Flat on wooden boards in a climate-controlled area, away from direct sunlight. Hides stored folded develop hard creases that are difficult to cut through cleanly.
Can I pick my own hide position?
For RAVEN Edition commissions, yes — I can show you the hide and we can discuss which sections suit your piece. For ROGUE Collection work, I select the best position based on the design.
Ready to talk about a custom piece? Call (250) 719-1332 or email info@rogueartisan.ca and I'll walk you through hide options for your commission.