Journal · From the Bench
How a Leather Wallet Is Made
Every wallet you see in the video is cut, skived, glued and hand‑stitched by Gordon Mielke in his East Vancouver studio, starting at $115 CAD for a classic bifold and $65 CAD for a card holder; each piece is one‑off, full‑grain leather, finished with a Raven stamp if you want it.
What raw hide becomes a wallet?
Choosing full‑grain veg‑tan or Horween Chromexcel
I start each commission by hand‑picking a full‑grain vegetable‑tanned hide or a piece of Horween Chromexcel. The hides are 3–4 oz thick, giving enough stiffness for a bifold yet enough give for a pocket‑sized card holder. Each hide is inspected for grain consistency, natural markings and any blemishes that might affect the final look. The Raven maker mark is pressed into the leather after the edge work, unless the client opts out for a $10 surcharge.
How do I lay out the pattern on the hide?
From paper template to indigo hide
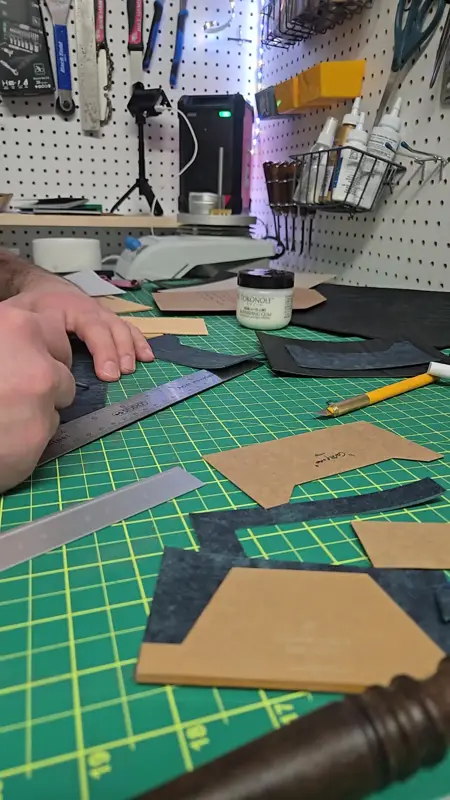
The first video clip shows the layout stage. I print a full‑scale pattern on kraft paper, then trace it onto the hide with a metal stylus. Because the hide stretches a bit, I pull the leather taut on a cutting board and double‑check the grain direction before committing to any cuts. This step is where the “custom wallet Vancouver” search query meets reality – the pattern is unique to each order.
Cutting and skiving: getting the panels right
Tools of the trade
A rotary cutter with a fresh blade slices the panels cleanly; I follow the traced lines, keeping the blade at a 90° angle to avoid ragged edges. Next comes skiving: using a handheld skiving knife, I thin the edges of the fold panels to about 1 mm. This reduces bulk when the wallet closes and allows the saddle stitch to sit flush. The video of skiving the edges shows the blade angle and the steady hand needed to keep the thickness uniform.
Glue‑up and assembling the small panels
Hide glue and clamping
After cutting, the inner pockets and the “card sleeve” pieces are glued together with a water‑based hide glue. I apply a thin, even coat on both mating surfaces, press them together, and clamp with a simple wooden press for three minutes. The glue sets quickly, but I still let the assembly rest for ten minutes before stitching. This step is visible in the “Gluing up small panels” clip.
Saddle stitching by hand – the stitch that lasts
Needles, thread and stitching pony
Once the glue is dry, I mount the wallet on a stitching pony. I use a 2‑ply waxed polyester thread (800 lb test) and a 3‑mm stitching needle. The saddle stitch is executed by passing the needle through the same hole twice – once from the outside in, then back out – creating two interlocking rows that never unravel. The video of hand‑stitched saddle stitching shows the rhythm: a push, a pull, a lock, repeat. For a classic bifold I typically need 80–90 stitches; a card holder needs about 45.
Edge finishing, burnishing and the Raven stamp
From raw edge to polished look
With stitching complete, I bevel the raw edges using an edge beveler, then run the edges through a burnishing wheel with a bit of water and a dab of leather conditioner. The result is a smooth, matte edge that feels soft in the hand. If the client selects the Raven maker mark (the default), I press the embossed stamp with a hand‑held hammer; otherwise I leave the leather plain, charging an extra $10 for the omission. The “Edge work and finishing” clip captures the burnisher in action.
Why a custom wallet from Vancouver feels different
Rain, bikes and daily wear
East Vancouver weather is wet, and many of my customers bike to work. That means the leather must hold up to rain without stiffening. Full‑grain veg‑tan develops a natural patina that actually improves water resistance after the first few washes, while Horween Chromexcel’s oil‑infused finish repels moisture immediately. I finish each piece with a light coat of beeswax‑based conditioner so the wallet ages gracefully whether it’s in a backpack or a bike pannier.
Watch it happen at the bench
FAQ
How long does a custom wallet take to make?
From the moment the hide arrives to the finished piece, a wallet typically takes 7–10 business days. The timeline includes hide selection, cutting, stitching and final edge work.
Can I choose between veg‑tan and Chromexcel?
Yes. Both are full‑grain and hand‑checked. Veg‑tan starts with a natural color and develops patina; Chromexcel comes pre‑finished with a subtle sheen and a tighter grain.
Is the Raven maker mark included?
The Raven stamp is the default finishing touch at no extra cost. If you prefer a clean back, you can opt out for a $10 surcharge.
What’s the practical difference between a handmade wallet and a factory one?
Handmade wallets are built one‑off with saddle stitching, which never loosens. Factory wallets often use glued seams or machine stitching that can split under stress. The hand‑finished edge, custom thickness and rain‑ready conditioning also give a handmade piece a longer usable life.
How should I care for my wallet in Vancouver’s rain?
Wipe the surface with a damp cloth after a heavy downpour, then apply a thin layer of leather conditioner once a month. Avoid soaking the leather; the conditioner restores oils lost to moisture and keeps the edges supple.
Ready to start your own wallet? Call me at (250) 719-1332 or email info@rogueartisan.ca. I’ll help you pick the hide, set the dimensions, and get the Raven stamp on your new piece.
Custom leather wallets Vancouver • Saddle stitching by hand • Skiving and edge finishing • How a custom leather commission works • Leather wallet sizing guide • Contact