Journal · From the Bench
Bench Log: Leather Tote Build
I'm Gordon Mielke, the one maker at Rogue Artisan in East Vancouver, BC. This is a bench log of a leather tote build — the long cuts, the handling of full bag panels on a small bench, and the saddle stitching that holds a bag-scale commission together. A custom leather tote out of this shop starts from $265 CAD for a crossbody, made to order, one piece at a time, by hand.
Why a tote build is a different animal than a wallet
Wallets are forgiving. A tote is not. A bifold lives in your back pocket and only has to survive your thigh. A tote has to carry weight, hang from a shoulder, and take abuse at the seam where the strap meets the body. That's the seam that fails first on a bad bag, and it's the seam I spend the most time on.
Most of what I make is small — card holders, bifolds, passport sleeves. A tote is a step up in panel size and a step up in how much leather is moving across the bench at once. The clips on this page show the long cuts that start the build, and the rest of this log walks through what happens after the panels are off the hide.
The long cut — what the clip actually shows
The first clip on this page is the long cut. I'm pulling a rectangle for the body panel off a side of vegetable-tanned leather, straight edge to straight edge, with a steel ruler and a knife. On a wallet I might cut a 4" x 3" piece and be done. On a tote, the body panel is closer to 14" tall by 13" wide, and I'm cutting two of them — front and back.
A few things that matter on a cut this long:
- The ruler has to stay flat the whole way. If it tips even slightly at the 10" mark, the panel is bowed and the seam won't sit square later.
- The knife has to finish the cut in one pull. Picking up the knife mid-line leaves a nick that shows up as a wavy edge after the panels are folded and burnished.
- I'm cutting on a self-healing mat, but for bag panels I usually move to a piece of MDF on the bench so the mat doesn't compress under the ruler at full length.
You can see the rhythm of it in the clip — measure, score, commit to the pull, check the edge. It's the same motion as a wallet cut, just stretched out across a longer line.
Handling big panels on a one-person bench
My bench is roughly 4 feet wide. A tote panel, laid flat, takes up most of that. There's no room to lay out the front and back side by side with the gusset and the strap pieces and still have working space. So the build order matters.
I cut everything before I start assembling. Body panels, gusset, base, strap pieces, handle drops, any internal pockets. Then I stack them in the order they'll be sewn and clear the bench for the first seam. A wallet build lets you lay everything out at once. A tote forces you to think in stages.
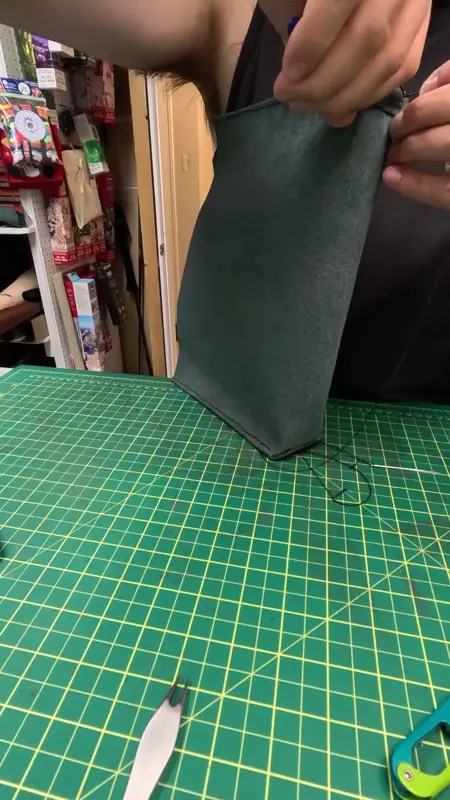
Working solo also means I'm the one clamping, the one folding, and the one running the needle. For the strap-to-body seam — the load-bearing one — I clamp the panel to the bench edge so I can pull the thread tight without the leather sliding across the mat. You can see a similar approach in my saddle stitching notes, just scaled up.
Materials for a bag-scale commission
For a tote I'm usually picking from two sides of leather:
- Full-grain vegetable-tanned, 5–6 oz for the body, 8–9 oz for the base and strap anchor points. The veg tan takes shape under use — a tote carried daily for a few months will slump into the wearer's shoulder in a way chromexcel won't.
- Horween Chromexcel, 4–5 oz for the body. Softer out of the gate, more drape, less break-in. Good if the customer wants a bag that feels broken-in from day one.
Thickness matters more on a bag than on a wallet. A 3 oz panel looks fine on a card holder and turns into a floppy tote that won't stand on its own. I bump up to 5 oz minimum for the body and go heavier at the stress points. If you're curious about what those weights mean in practice, the full-grain vs. genuine breakdown covers the leather side, and the Chromexplained page covers the Horween side.
The seams that actually carry the load
Three seams on a tote do the work. Everything else is structure or finish.
1. The side seam (body to gusset)
Long, straight, and easy to mess up. If the gusset is even 2 mm shorter than the body panel at the top, the bag will gap at the opening once it's sewn. I measure the gusset, mark both ends, and pin before any thread goes in.
2. The base seam (body to base)
This is where the bag sits on the ground, on transit seats, on wet Vancouver pavement. I reinforce the base seam with a second row of stitching about 3 mm in from the first. Two passes, same thread path, slightly offset. It doubles the stitch count at the most stressed corner.
3. The strap anchor
The strap is the part that pulls on the bag, and the bag is the part that pulls on your shoulder. That load travels through a small rectangle of leather where the strap folds back on itself and is stitched down. I cut that anchor from 8–9 oz leather regardless of what the body is, and I stitch it with a box-X pattern — a rectangle with an X through the middle — not a single straight row. The X spreads the load across four lines of thread instead of one.
All three seams are saddle stitched by hand. Two needles, one thread, each stitch locked against itself. Machine stitching is faster, but a saddle stitch won't unravel if one stitch is cut — which matters on a bag that's going to see years of shoulder weight.
Edge finishing on panels this size
Edges on a wallet are maybe 4 inches of perimeter. Edges on a tote are closer to 50 inches once you add the body, gusset, base, and strap. That's a lot of burnishing.
I run the edges with a beveler first to knock off the sharp corner, then slick them with water and a wooden burnisher. On veg tan the burnish goes dark and shiny. On Chromexcel it stays a bit softer and more matte. Either way, the edge needs to be slicked before the bag is assembled — once the gusset is sewn in, the inside edge of the side seam is a lot harder to reach.
If you want to see how the smaller-scale edge work compares, the skiving and edge finishing journal entry has more on the bevel-and-burnish sequence.
Vancouver-specific realities for a bag build
A leather tote in Vancouver is going to get rained on. That's not a maybe, it's a when. A few things I do because of that:
- I avoid raw, unfinished linings on totes — they wick moisture and stain. If a customer wants a lining, it's a lighter-weight leather or a treated fabric, not an untreated suede.
- I finish the strap edges harder than I would for a dry climate. A slicked, waxed edge sheds water better than a burnished-only edge.
- The base gets a coat of leather balm before the bag leaves the bench. Not a heavy wax — I don't want the bag to look shiny out of the gate — but enough to slow the first few rainstorms. The leather care in Vancouver rain page has the full routine.
Most of my customers are walking, biking, or transit-commuting with these bags. The tote that lives on a bike pannier rack gets a different conversation than the one that lives on a desk.
From a tote build to a crossbody commission
The build above is the bones of how a custom leather bag comes together in this shop. If you're looking at a smaller, body-crossing bag with an adjustable strap, that's the crossbody — from $265 CAD, made to order, one at a time. Same hide selection, same saddle stitch, same hand-finished edges, just a different panel layout and a strap that adjusts instead of fixed-length handles.
For a sense of how a commission moves from first message to finished piece, the commission process journal entry walks through it step by step. And if you want to see the smaller builds that share the same bench and the same tools, the card wallet bench log is the closest comparison.
Watch it happen at the bench
FAQ
How long does a leather tote build take?
I don't quote turnaround times. A bag-scale commission moves through cutting, edge work, assembly, stitching, and finishing, and the time depends on the panel count and the strap hardware. Get in touch and I'll give you a current read on the bench.
Can you make a tote with a zipper?
Yes. Zippered totes are a common RAVEN Edition request. The zipper is set in by hand and the ends are folded and stitched into the top seam.
What leather do you recommend for a daily-carry tote in Vancouver?
For rain and transit, full-grain vegetable-tanned at 5–6 oz is the most forgiving — it sheds light moisture, takes shape under use, and can be re-balmmed. Chromexcel is softer out of the gate but needs more care in wet weather.
Do you ship totes across Canada?
Yes. Local pickup is available in East Vancouver, and I ship across Canada on request. Bags go out flat-packed, not folded.
Can I bring my own leather?
Sometimes. If it's a side I can evaluate on the bench — thickness, temper, finish — I'll tell you straight whether it'll work for a bag build. Not every hide is suited to a load-bearing strap anchor.
Got a tote or crossbody in mind? Call (250) 719-1332 or email info@rogueartisan.ca and tell me what you carry and how you carry it. I'll tell you what's realistic from one hide, one bench, and one pair of hands.