Journal · From the Bench
Bench Log: Custom Knife Sheath
Gordon Mielke builds custom leather knife sheaths to order in his East Vancouver workshop — one at a time, fitted to the specific blade you carry. Vegetable-tanned leather, hand-saddle-stitched, wet-formed around the knife so it seats without slop. Every sheath is quoted individually — the blade, the leather, and the belt-loop hardware decide the price, and you get a firm number before any leather is cut. If you've got a fixed blade or a folder you want sheathed properly, this is how the bench work actually goes.
What the clips show on this page
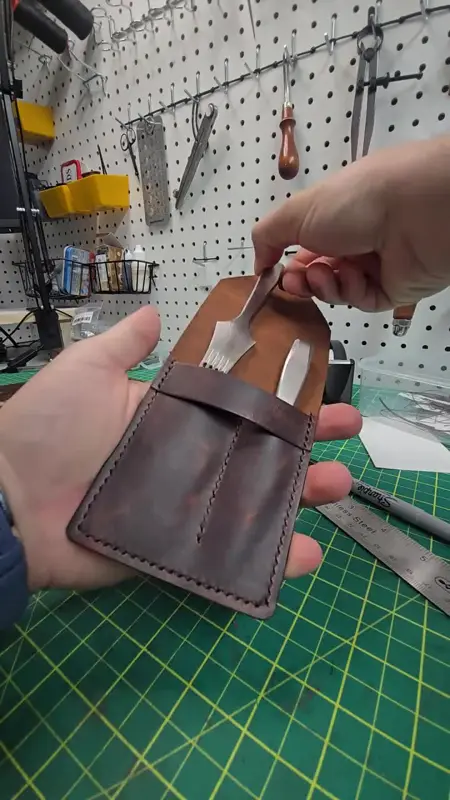
The short clip embedded on this page is unedited bench footage of a sheath taking shape — mid-build, panels cut and fitted, the leather being worked around the blade's profile on the bench. No studio setup, no second takes; it's a phone propped on the bench while the work happens.
None of it is sped up, none of it is staged. It's the same sequence I'd run on any commission that comes through the bench.
Why a sheath has to be wet-formed, not just glued shut
A sheath that isn't formed to the blade will rattle. That's the whole problem with mass-produced sheaths — the inside is a generic cavity, so the knife shifts in transit and the edge eventually wears through the stitching from the inside out.
The fix is wet-forming. I soak the leather (vegetable-tanned only — Chromexcel doesn't take a wet memory the same way), wrap it around the blade, clamp it, and let it dry overnight. The leather dries into the exact shape of that knife. When you slide it back in, it seats with a soft thunk. Pull it out, the sheath holds its form. That's the sound you want.
It's also why I need your blade in hand for a proper fit. Photos and measurements help, but the wet-forming only works if I can press the actual steel into the actual leather. Bring it by the East Vancouver studio, or ship it insured and I'll ship it back with the sheath.
Stitch lines that hold under pull
A knife sheath sees real stress. The belt loop takes your bodyweight when you're crouching, the mouth takes the constant drag of the blade sliding in and out, and the spine takes whatever you bump into in the bush. Stitching has to be the right type, the right spacing, and the right thread.
I saddle-stitch every sheath by hand. Two needles, one length of waxed Tiger thread, each stitch locked against the next. It's slower than machine sewing — a sheath might take 45 minutes just for the seam — but a saddle stitch won't unravel when one stitch fails. A lock-stitch from a sewing machine will. There's a longer breakdown of the technique in the saddle-stitching journal entry.
Stitch spacing on a sheath is usually 7 stitches per inch on the body seam, tightened to 8–9 SPI on the mouth and belt loop where the stress concentrates. Stitch holes are punched with a pricking iron and tapped through with a mallet — no rotary punch, no awl wandering.
Hide selection and thickness
Most sheaths get built from 6–7 oz vegetable-tanned shoulder or belly. Shoulder is denser, takes a cleaner wet-form, and holds stitch holes without distorting. Belly is softer and drapes better for curved blades but the stitch holes can spread under load. For smaller folders I sometimes drop to 5 oz; for big choppers or bush knives I'll laminate two pieces back-to-back to push past 10 oz.
Every hide gets checked by hand before it touches a blade. I look for scars, brand marks, and weak spots in the belly — anything that could telegraph through to the surface after forming. The hide-cutting journal entry shows how I lay out a sheath pattern to dodge those zones.
Color is a separate decision. Natural veg-tan starts pale and darkens to a honey amber over the first year of carry. If you want it dark from day one, I can oil it with a saddle tan or send it to a darker finish. The Horween Chromexcel option is for people who want a pull-up sheen and don't mind a softer, more pliable sheath — not ideal for hard-use fixed blades but great for light-carry folders.
Edge finishing and the mouth
The mouth of the sheath is the part that takes the most abuse. It's where the blade enters and exits, where the edge of the steel can nick the leather, and where a sloppy finish will fray first. I bevel the mouth edges with an edge beveler, sand them through 400 then 600 grit, and burnish with a wood slicker loaded with beeswax and gum tragacanth. The result is a hard, dark, waxy edge that resists fraying and water.
Same process on the spine and the belt loop. The full sequence — bevel, sand, slick, wax — is in the edge-finishing journal entry if you want the step-by-step.
Vancouver-specific realities
Rain. It matters here. A sheath that lives on a belt through a Coast winter is going to get wet, repeatedly. Vegetable-tanned leather handles it fine as long as it gets to dry between soakings — don't leave a wet sheath in a sealed bag or car trunk. Chromexcel handles rain even better but will show water spotting if it dries unevenly.
If you're commuting by bike with a fixed blade on your hip, I'll build the belt loop wider and add a secondary retention strap so the knife doesn't bounce out over potholes. Transit riders usually want a low-profile loop that sits flat against the belt and doesn't print under a jacket. Tell me how you carry and I'll spec the loop accordingly.
Commissioning a sheath for your blade
The process is the same as any other Rogue Artisan commission — one maker, one piece at a time, no two alike. Send me a photo of the blade with measurements (overall length, blade width at the widest point, handle thickness), tell me how you carry it, and pick your leather. I'll quote from there.
Lead time depends on the queue. I'll tell you honestly when I can start. When the sheath is done, you'll get photos before it ships. The full commissioning flow is laid out in how a custom leather commission works.
Watch it happen at the bench
FAQ
Do I need to send you my knife?
For the best wet-formed fit, yes — either drop it off at the East Vancouver studio or ship it insured. If that's not possible, I can work from detailed measurements and a cardboard template of the blade profile, but the fit won't be as precise.
What kinds of knives do you sheath?
Fixed blades mostly — bush knives, hunters, chef's knives, small utility blades. Folders work too but the sheath is usually just a slip cover since the blade folds into the handle. I don't build sheaths for tactical autos or anything that would put the workshop on a list.
Can you add a belt loop and a clip option?
Yes. Standard is a sewn belt loop, about 1.5" wide to fit a standard belt. I can also do a low-profile riveted loop, a dangler loop that hangs below the belt line, or a kydex-style belt clip mounted to the leather. Each option changes the price — I'll quote it before I start.
What does a custom sheath cost?
There's no flat sheath price — every blade is a different shape and every build is quoted on its own. Leather choice (Premium Leather adds $20), custom colour (+$8), stitching detail, and hardware all factor in. I give a firm quote before any work starts — no surprise totals.
How long does it take?
Depends on what's already on the bench. I'll give you a realistic start date when you reach out. Simple sheaths run a few hours of bench time once I start; more complex builds with multiple layers, dyed finishes, or carved detail take longer.
Will the sheath fit my specific belt and carry style?
Tell me how you carry — IWB, OWB, pack, belt, pack strap,挂在包上 — and I'll build the loop and retention to match. A hunter's belt is different from a work belt is different from a backpack strap, and the loop geometry changes for each.
Got a blade that needs a proper sheath? Call (250) 719-1332 or email info@rogueartisan.ca and tell me what you're carrying. Knife in hand is better, but measurements and a photo will get the conversation started.