
Journal · From the Bench
Bench Log: Awl Guard Key Fob
I’m Gordon Mielke, the one maker at Rogue Artisan in East Vancouver, cutting and stitching every piece by hand from full-grain vegetable-tanned leather or Horween Chromexcel — the awl guard key fob starts at $35 CAD, the keychain fob at $45 CAD, and even these small gifts take real time because setting hardware right — whether rivets or stitching — demands focus, the right tools, and hide that won’t split under pressure.
Why Small Pieces Still Take Bench Time
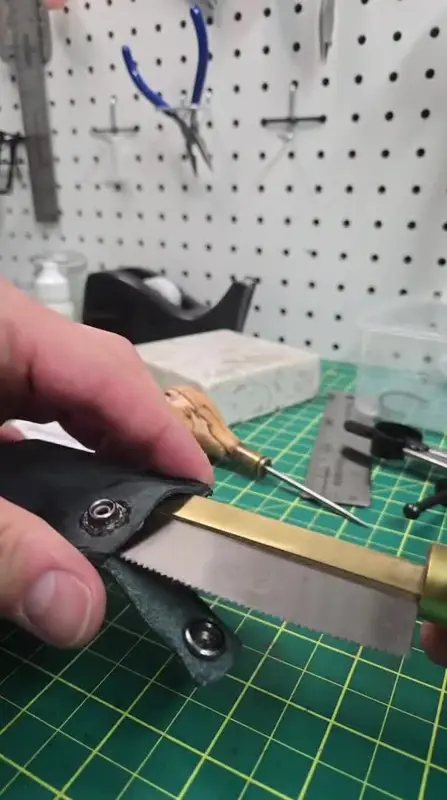
People assume a key fob is quick because it’s small. It’s not. The awl guard design has a tapered slot to hold an awl shaft securely, plus a split ring for keys. That slot needs precise shaping — too loose and the tool falls out; too tight and you can’t insert it. I cut the slot with a swivel knife, then widen it gradually with a diamond chisel, testing fit as I go. The video on this page shows me setting the hardware: first marking rivet placement with a scratch awl, then punching holes with a 2mm hollow punch. Even on a 3-inch piece, you’re working within millimetres — one slip and the hole’s in the wrong spot.
Rivets vs Stitching for Hardware
For the awl guard, I use two solid brass rivets — 6mm cap, 8mm length — to attach the split ring hardware. Why rivets? Because the split ring creates constant torque when keys jingle. Stitching alone would loosen over time, especially with the sideways pull. I set the rivets with a rivet setter and ball-peen hammer, peening the shaft over the washer on the back. It’s cold-forged metal-to-leather; no glue, no shortcuts. The keychain fob, by contrast, often uses stitching for the ring attachment because the load is more vertical — but I still reinforce it with bar tacks at stress points. You’ll see in the clip how I seat the rivet snug against the leather — not crushing it, not leaving it proud.
Hide Selection and Thickness
I use 3-4 oz vegetable-tanned leather for the awl guard — thick enough to hold the rivet without tearing, thin enough to fold neatly over the hardware. The video shows me selecting a piece from the shoulder butt: tight grain, minimal stretch. I avoid the belly; it’s too soft and will deform around the rivet over time. Chromexcel works too, but it’s oilier — I scuff the surface lightly with 220-grit paper before riveting so the washer seats properly. Edge finishing? I bevel with a #2 edge beveller, then burnish with water and a canvas slicker — no gum tragacanth on these small pieces; it’s too messy and unnecessary for a fob that lives in a pocket.
Stitching Details (When Used)
On the keychain fob, I saddle-stitch with 0.6mm polyester thread — two needles, locked stitch. The video shows me chiseling the holes with a 3.5mm diamond chisel, 5 stitches per inch. I pull each stitch tight with my stitching pony and needle gripper — no sewing horse needed for scale this small, but the tension still matters. A loose stitch here means the ring shifts; too tight and the leather puckers. I backstitch twice at the start and end, then bury the threads with an awl before trimming. It’s not decorative — it’s structural.
Vancouver Realities: Rain, Transit, Bike Commuting
These fobs live in pockets, on bike belts, clipped to transit passes. Vancouver rain means I always recommend the vegetable-tanned option for the awl guard — it’ll darken evenly with use, develop a patina that hides water spots. Chromexcel handles moisture better initially but can look streaky if not conditioned. I’ve seen bike couriers wear these fobs daily — the constant flex against a hip belt tests the rivet setup. That’s why I test each one by hanging 200g of keys from the split ring for 10 minutes before shipping — no video shows that, but it’s part of the bench log.
Watch it happen at the bench
FAQ
Can I get the awl guard key fob without the rivet hardware?
No — the awl guard is defined by its hardware setup. The tapered slot and rivet-attached split ring are what make it functional for holding an awl. If you want a plain fob, the keychain fob is the better base.
How long does it take to make one of these?
From cutting to finished edge? 25-40 minutes, depending on the hide and hardware. It’s not the cutting — it’s the setup: marking, punching, testing fit, setting rivets cleanly. Small scale doesn’t mean fast; it means precise.
What’s the difference between the awl guard and keychain fob?
The awl guard has a specific slot for holding a stitching or marking awl, secured with rivets. The keychain fob is a simpler loop or tab for keys — often stitched, sometimes riveted — but without the tool-specific shaping. Both start at $35 and $45 CAD respectively.
Can I omit the Raven stamp on these?
Yes — it’s a +$10 add-on to leave it off. The stamp goes on the back, low and centered. If you’re gifting it and want it neutral, skip it. If you want it there, it’s free.
Do these come in colours?
Custom colour is +$8 — I dye the vegetable-tanned leather myself. Horween Chromexcel comes in set shades (like bourbon or black), but I can’t alter those. The video shows natural veg-tan — you’ll see how it takes dye evenly if you choose that route.
Is this a good gift?
Absolutely — it’s small, useful, and made to last. I ship across Canada with no minimum. If you’re local, pickup’s available from my East Vancouver studio. Link in the footer.
Ready to talk hardware, hide, or a custom gift? Call me at (250) 719-1332 or email info@rogueartisan.ca.